Digital Editing for Luddites
Tools of the Trade – dale rogers 2012
Camera
Any digital camera will work. I have used, and continue to use, a number of digital cameras from my phone to a Canon 400D.
Seriously, anything from your mobile phone to the best digital SLRs will work here.
Computer
I have no delusions about my own computer equipment – basically it sucks. The point here is that you don’t need a you beaut computer system to create good images. I still work on a PIII 633 Gateway machine that I bought around 10 years ago. It is a dinosaur but I manage to make it work by NOT using memory and processor intensive programs like those made by Microsoft. I run the old machine on Linux, specifically Ubuntu Linux. If I have you intrigued and you want to know more about Linux go check out Linux.com.
The biggest investment you can make in your computer is to ensure you’ve got a healthy supply or RAM and decent hard drive space. If you’re unsure about these characteristics of your computer, seek the advice of your nearest geek (or give me a shout).
Software
Many people do one of two things to their images after they download them to the computer. 1. Nothing – they leave them as they are or 2. They use Adobe Photoshop to edit them. I’m not going to cover editing your photos with Photoshop cause it costs way too much cash for me to legally afford and, this tutorial is about getting good picts with little money. So, if you don’t already have a working copy of the GIMP on your computer, rush over here and download a copy – it’s free. GIMP is a free image editing program that has most of the features of Photoshop. I’ve used both extensively and while I appreciate the power of Photoshop, I find that I can do most anything I want to a photo with the free and open source GIMP.
GIMP runs on just about any operating system (Windows, Mac OS X and Linux).
Now We’re Ready to Go
OK, I’ll assume you have the GIMP correctly installed on your computer, that you are able to download your photos from your camera or phone and you have made yourself a nice cup of tea before we begin.
Let’s Open a Photo
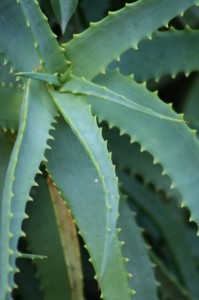
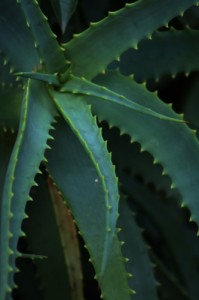
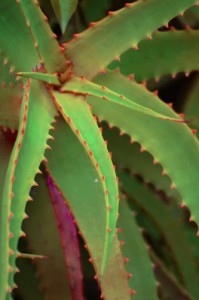
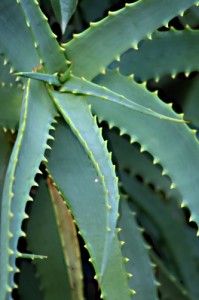
Fire up the GIMP and select File>Open. Navigate to an image you want to play with. I’ll work on one I took earlier this year. I was chasing my three year old around the house when I quickly stopped and snapped this picture of an aloe vera plant.
You may look at your photo and think that you’d like to trim it just a bit to center your subject or create better ‘framing’. The GIMP has a nice crop tool in the tool bar. It’s the one that looks like a scalpel. If your unsure, just hover your mouse over the GIMP tool icons until one of the labels identifies it as the Crop Tool.
I love the Crop Tool. One thing to keep in mind when using Crop – if you’re planning on printing your photos, be sure and keep the photo ratio in tact. The ratio is the width/height ratio. After you select the Crop Tool, you’ll notice a small check box labeled Fixed : with a drop down menu afterwards. Check the box next to fixed and I’d recommend you select Aspect ratio from the adjacent drop down box.
That’ll allow you to crop your photo and retain it’s ratio or shape. Remember, if you accidentally make a mistake or do something you don’t like with the GIMP, there’s always the Edit>Undo option.
Basic Adjustments
Now we’ll move on to some of the basic adjustments you can make that can enhance your photo quickly. Under the Color menu above your GIMP image, you’ll find lots of handy tools. For the examples, I’ll start with the basic aloe.jpg photo then add the the tool under discussion for a demonstrated effect. Often you will want to combine several of these photo tweeks but for my examples, I’ll keep adjustments simple. I’d encourage you to explore all of the options and variations and be sure and check out the GIMP manual. Let’s try the Level adjustment first.
Levels
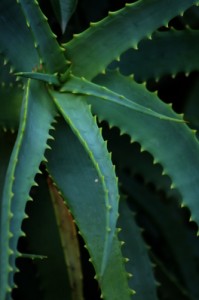
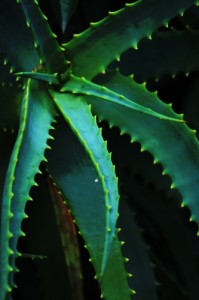
The Level tool can change the intensity range of the photo. This tool is used to make an image lighter or darker, to change contrast or to correct a predominant color cast. When you select the Colors>Level tool, a histogram box will pop up. You’ll notice a small slider just under the histogram. Grab the slider and move to the right and left and notice the difference it makes to your photo. Here’s my photo where I’ve adjusted the slider to the right. It has given the aloe photo a darker, richer look.
Curves
The Curves tool is the most sophisticated tool for changing the color, brightness, contrast or transparency of the active layer or a selection in your photo. If you’re unsure what that means, no worries, I’ll walk you through using the tool in a minute. While the Levels tool allows you to work on Shadows and Highlights, the Curves tool allows you to work on any tonal range.
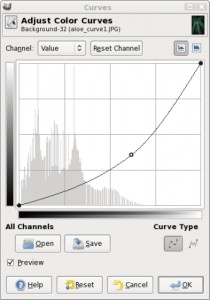
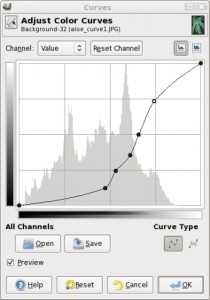
OK, now select Color>Curves on your photo. You’ll get a neato grid with a grey histogram and a line going from the lower left to the upper right. Again, it all looks complicated but let’s make an easy adjustment and see what it does to the image.
First, click in the middle of the angular line and pull the line down slights with your mouse. You’ll notice your photo is looking alot like it did when we used the levels tool. Now comes the fun bit … hang on … click on an area of the line you have just pulled down (it’s now more of an arc than an angled line) to the right of the mid point. Pull this part of the curved line up just a little.
Watch what happens to your photo. Click below the mid point of your arc and pull the line down a little. See the changes?
You should experiment with this tool for awhile and get get the general feel for manipulating the ‘curve’ to produce results.
Let’s move on to playing with color.
Hue-Saturation
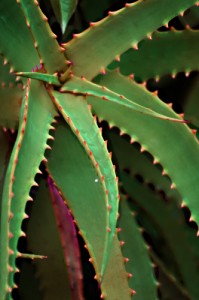
Select Color>Hue-Saturation on your photo. Here’s more configuration razzle dazzle. What’s worth playing with are the three sliders sitting under the bold heading Adjust Selected Color. I’ll grab the Saturation slider and give it a good yank to the right … oh ahhhh …. my aloe becomes very green. But I won’t stop there. I’ll now push the Hue slider around. Well, maybe I went too far, here’s the aloe very Saturated and over Hued!
I’ll give it another go because I noticed that while playing with the sliders I could bring out a nice red color on the spines of the aloe. I like that.
Speaking of color, let’s do more.
Colorize
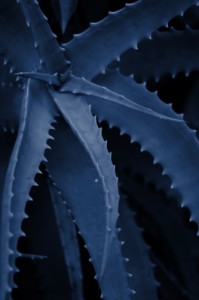
Colorize is a great way to put a color tone or wash over the photo. Sometimes it has a great effect, other times, no so much. Select Color>Colorize on your photo. You’ve got a selection of sliders again. Go like mad and see what effect they produce. For the aloe.jpg, I’ve selected a nice blue tone with a slight twist of saturation. Do you like it?
The final tool in our down and dirty Color menu that I’ll demonstrate is the Color Balance.
Color Balance
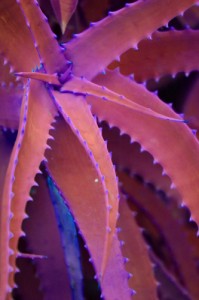
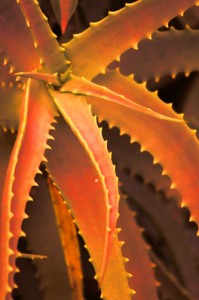
Go for Color>Color Balance. Wow, surprise, you get some more sliders. Three in fact. On top of the sliders you even get a selection of radio buttons. I hope that by this stage you have overcome some of the hesitation and fear about jumping in and experimenting with your photos. Jump in with reckless abandon and work some color magic. I ended up with this lovely fire aloe.
So that’s it for the quick tweeks in the Color Menu. I want to show you one final essential trick in my arsenal before moving off these photo enhancements. Let’s have a crack at sharpening your photo.
Sharpening
In GIMP you have a couple of options if you want to sharpen your image. The first is a straight forward Filters>Enhance>Sharpen move. It’ll do an auto sharpen on your image. But, hey, who wants to do anything automatically when we can play with sliders? Ditch the auto crap and let’s pull out the big one Filters>Enhance>Unsharp Mask. Like all the other tools, I’m sure you’d benefit from carefully reading the GIMP manual to grasp all of the idiosyncrasies of the Unsharp Mask – I’m sure I would. But, if your like me, you’ll just start pushing things around and rely on the preview to guide you.
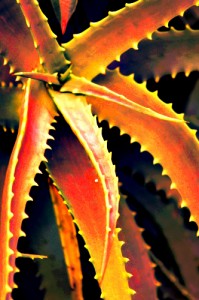
I’ve kept the fire aloe from the previous tool and went straight to the Unsharp Mask. Here’s the stark results.
This is a little over kill but you get the general idea. Right? Just for Kicks, here’s the original aloe.jpg using Unsharp Mask.
That’s all of the enhancements that’ll I’ll show you this go around. There’s heaps more you can do like using image burn, alpha masks, spot colorizations and more that I’ll run down in later tutorials.
Now that you have played around with your photo, you should be able to put together a combination of some of the above techniques to feel quiet satisfied with the result. Here’s my aloe.jpg.
If I remember correctly, I used Level, Hue-Saturation, and Unsharp Mask to get the final.
So now what are you going to do with your image? If you’re gong to print it … then your basically done.
I recommend that you upload your photo to a artists/photographers community website such as deviantart, flickr or redbubble. I found that by pitching my photos out there for others to see and comment upon, I learned and gained more confidence. I also recommend that you seek out photographers that you admire and you ‘watch’ them. A lot can be learned from just watching what a good photographer produces as well as having the opportunity to interact and seek advice from them.
If you do head over to flickr, look me up and give me a yell!
It’s that simple … and better yet, it costs next to nuthin!
Part 2 – Using the threshold tool in the gimp
Dale is a Native Texan now living on the island. He is a member of the Phillip Island Camera Club and specialises in iPhoneography and edited digital images.
GIMP is an acronym for GNU Image Manipulation Program. It is a freely distributed program for such tasks as photo retouching, image composition and image authoring. It has many capabilities. It can be used as a simple paint program, an expert quality photo retouching program, an online batch processing system, a mass production image renderer, an image format converter, etc.
GIMP is expandable and extensible. It is designed to be augmented with plug-ins and extensions to do just about anything. The advanced scripting interface allows everything from the simplest task to the most complex image manipulation procedures to be easily scripted. GIMP is written and developed under X11 on UNIX platforms. But basically the same code also runs on MS Windows and Mac OS X.
Download the latest version of the GIMP
One Comment
Pingback: